

How to enable 2FA for your Tesla account
Updated August 4, 2026
Two-factor authentication (2FA) protects your Tesla account even if your password leaks. Follow the steps below to generate Tesla verification codes with the Authenticator App on your iPhone, iPad or Mac.
Sign in and open your Tesla Account settings
On a computer, go to tesla.com and sign in to your Tesla Account with your email and password. Once you're in, open your Account Settings (multi-factor authentication is managed from the account website, not from your vehicle).
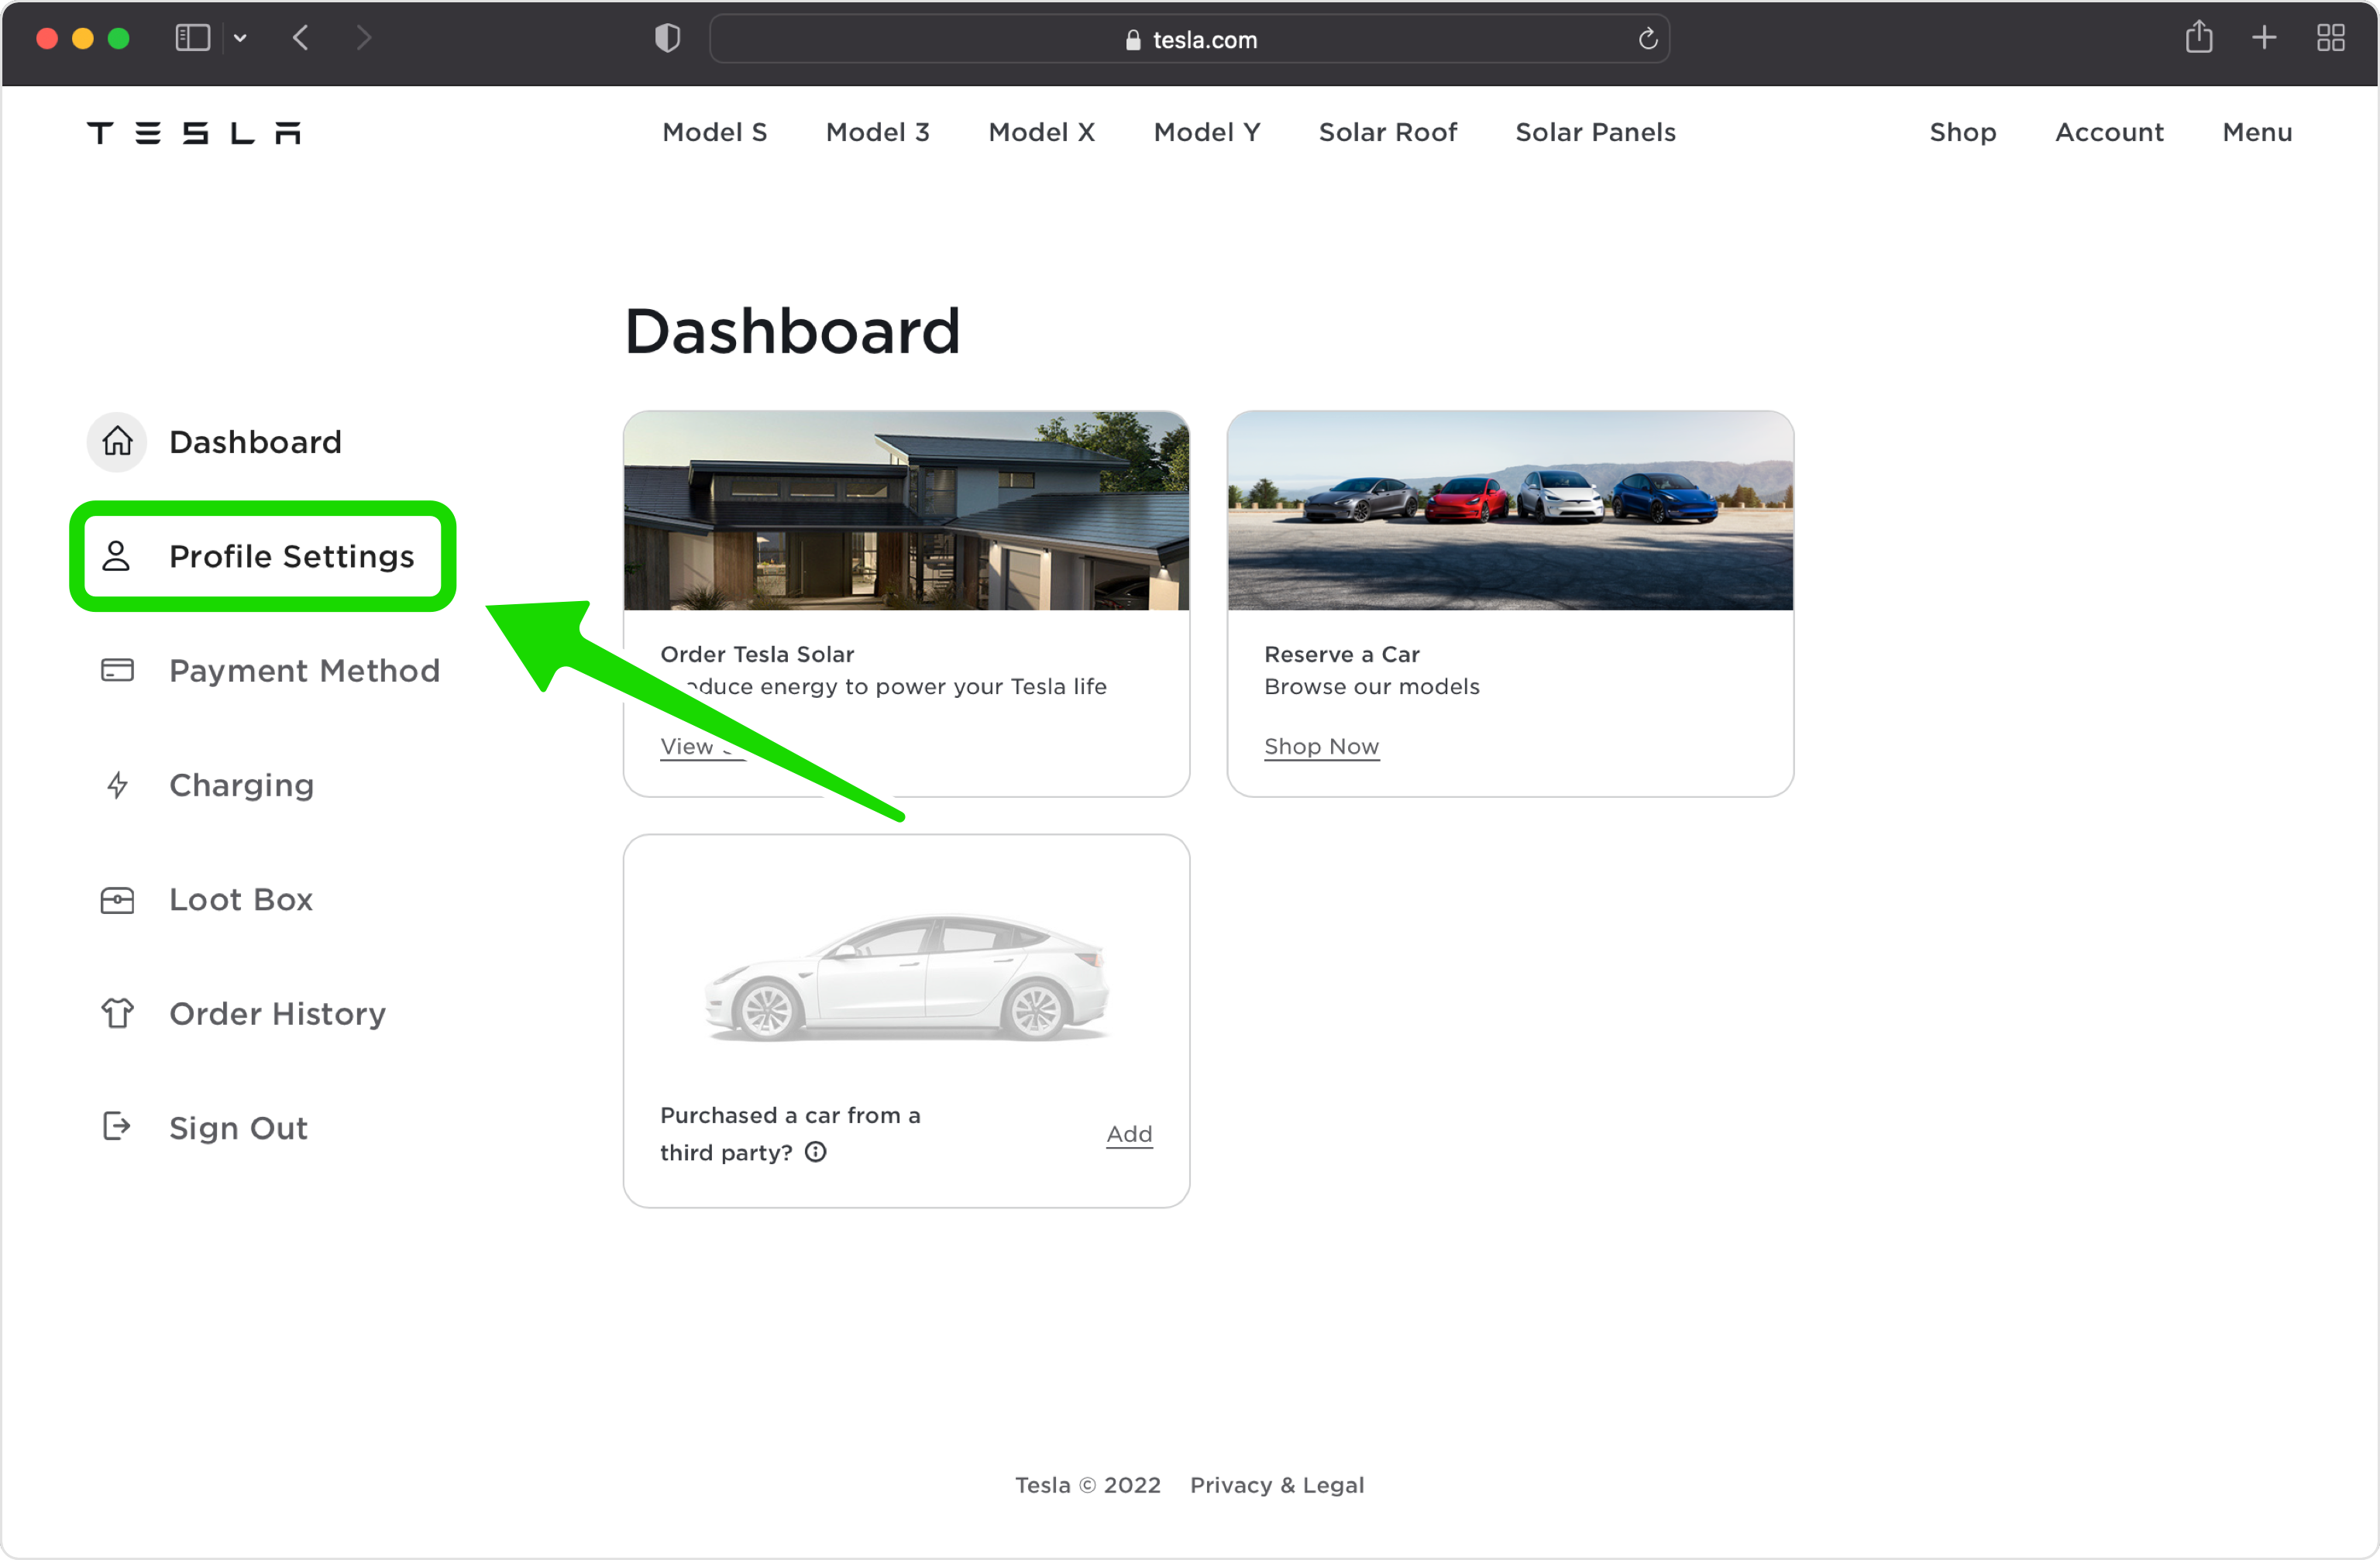
Go to Security and start MFA setup
In Account Settings, open the Security section. Next to Multi-Factor Authentication, tap Set Up to begin.
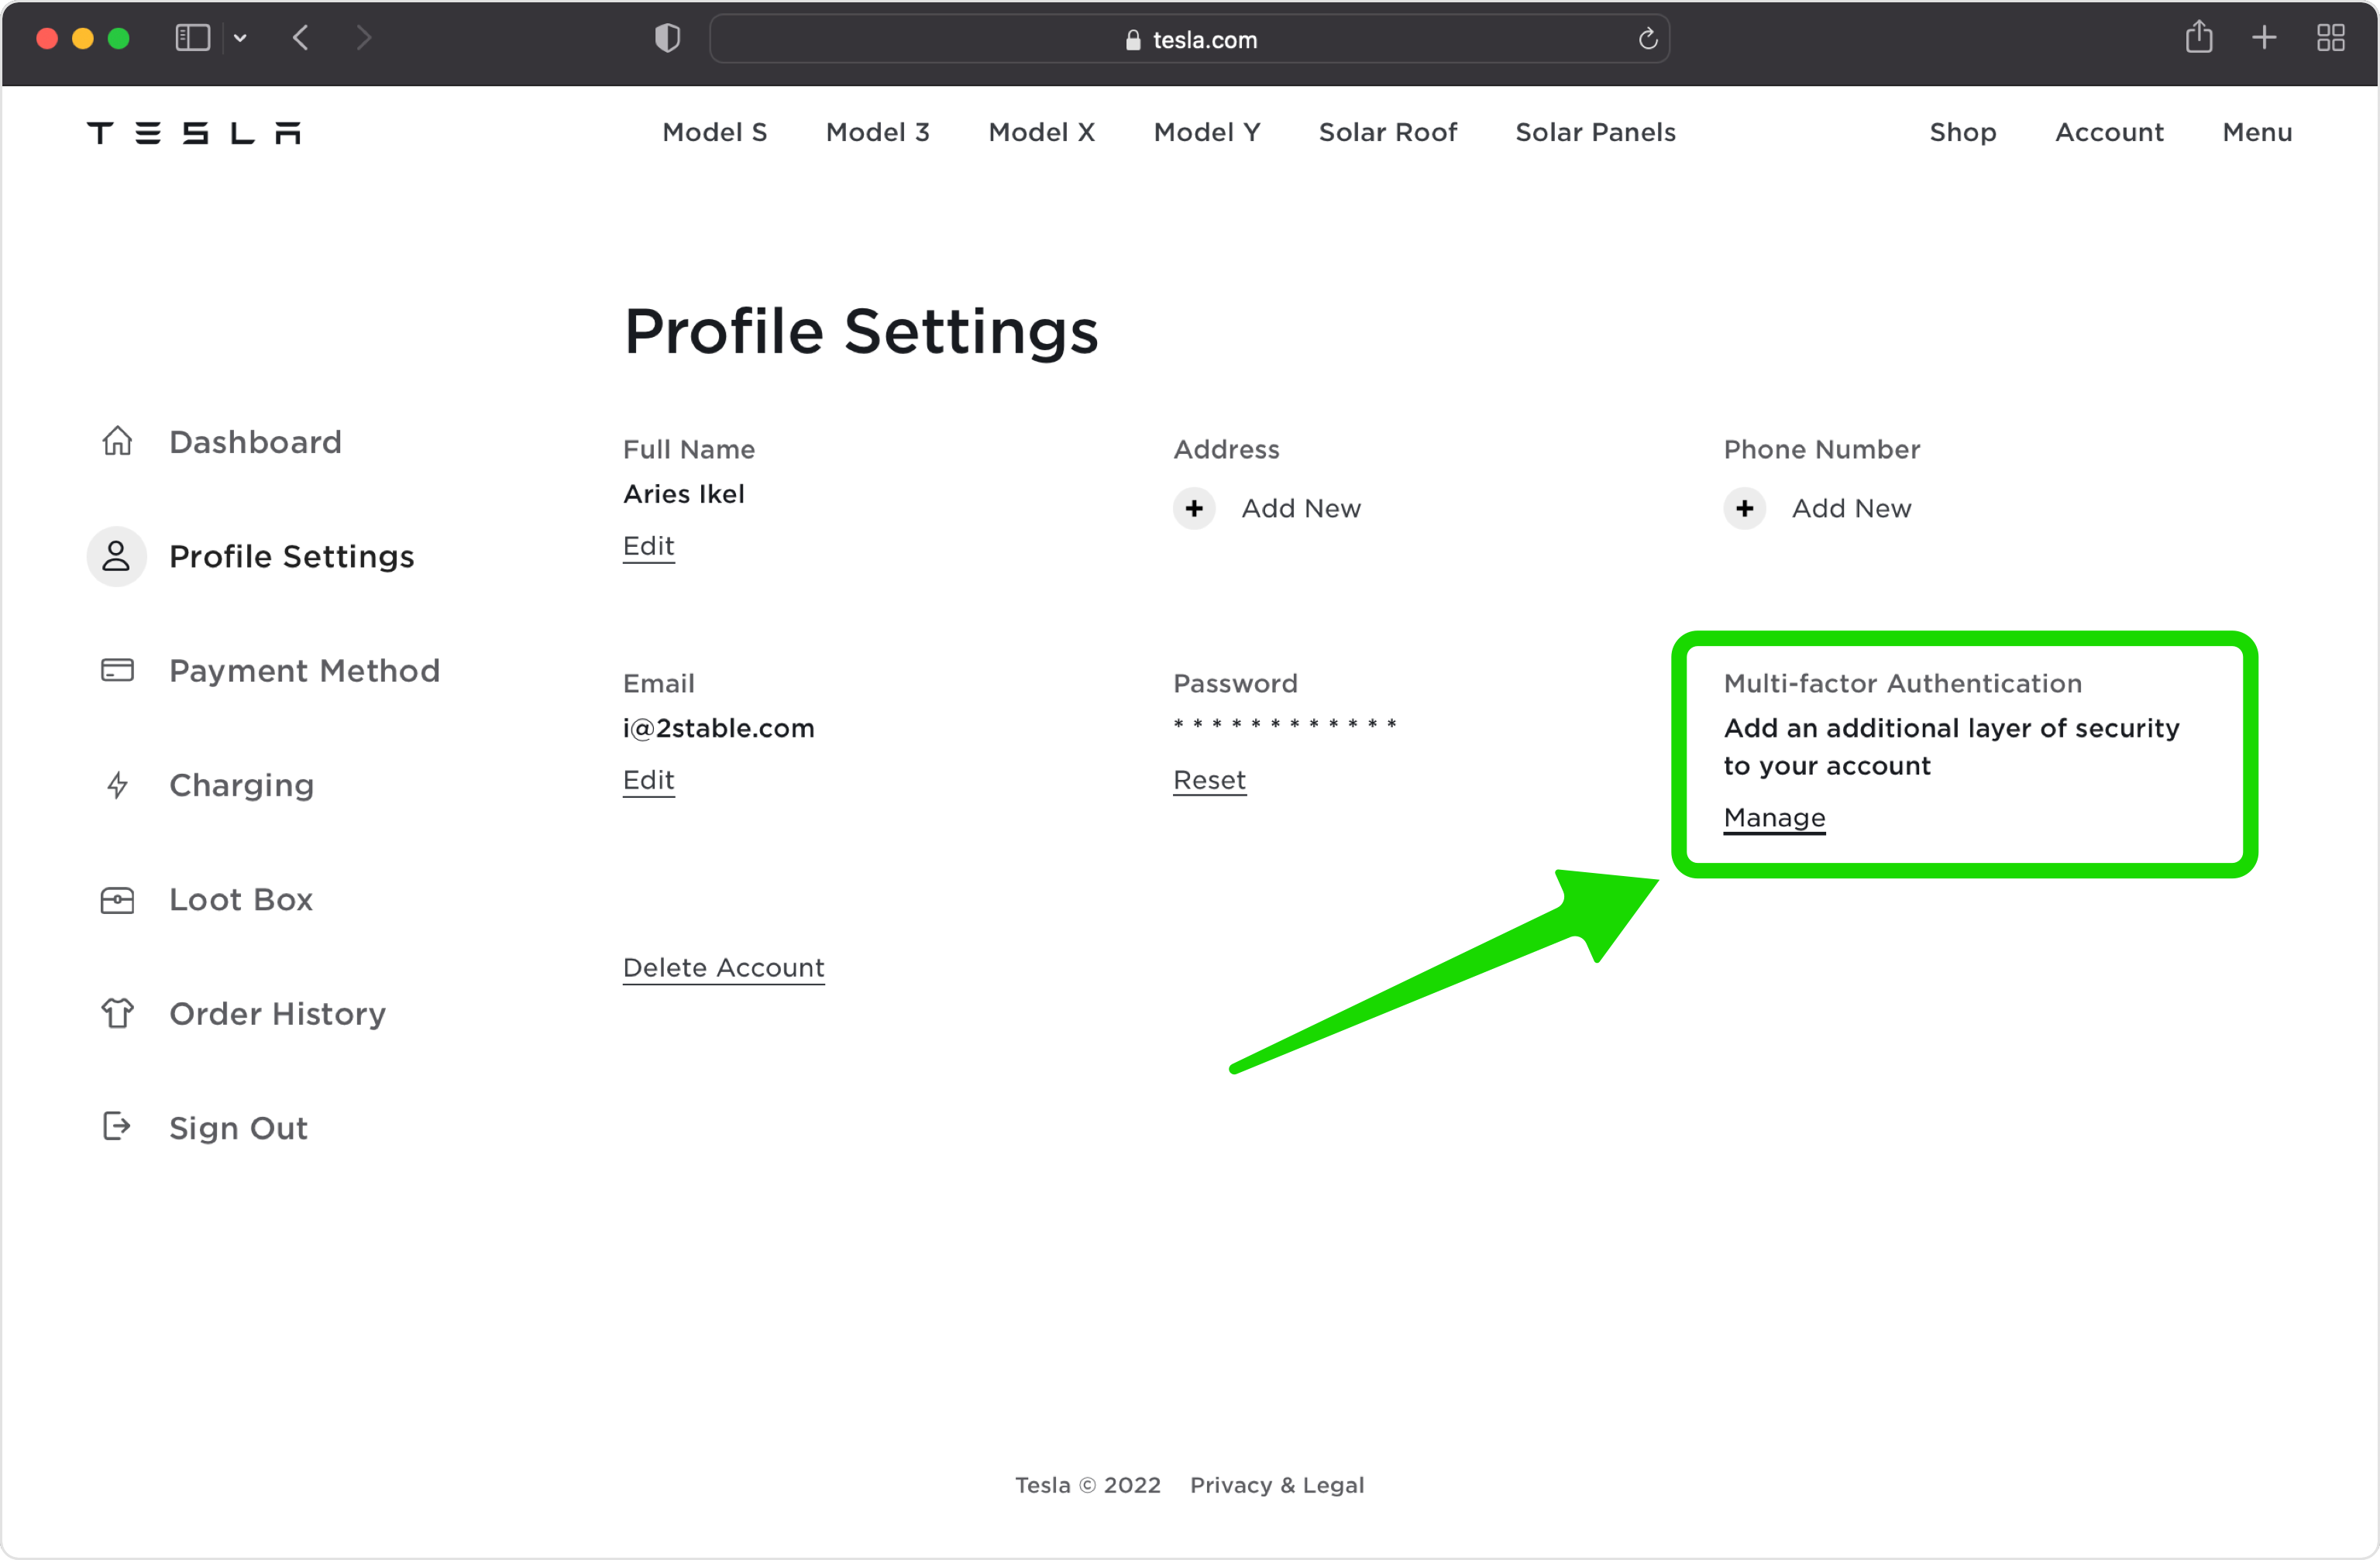
Continue past the intro screen
Tesla shows a short informational page explaining multi-factor authentication. Read it, then tap Next when you're ready to continue.
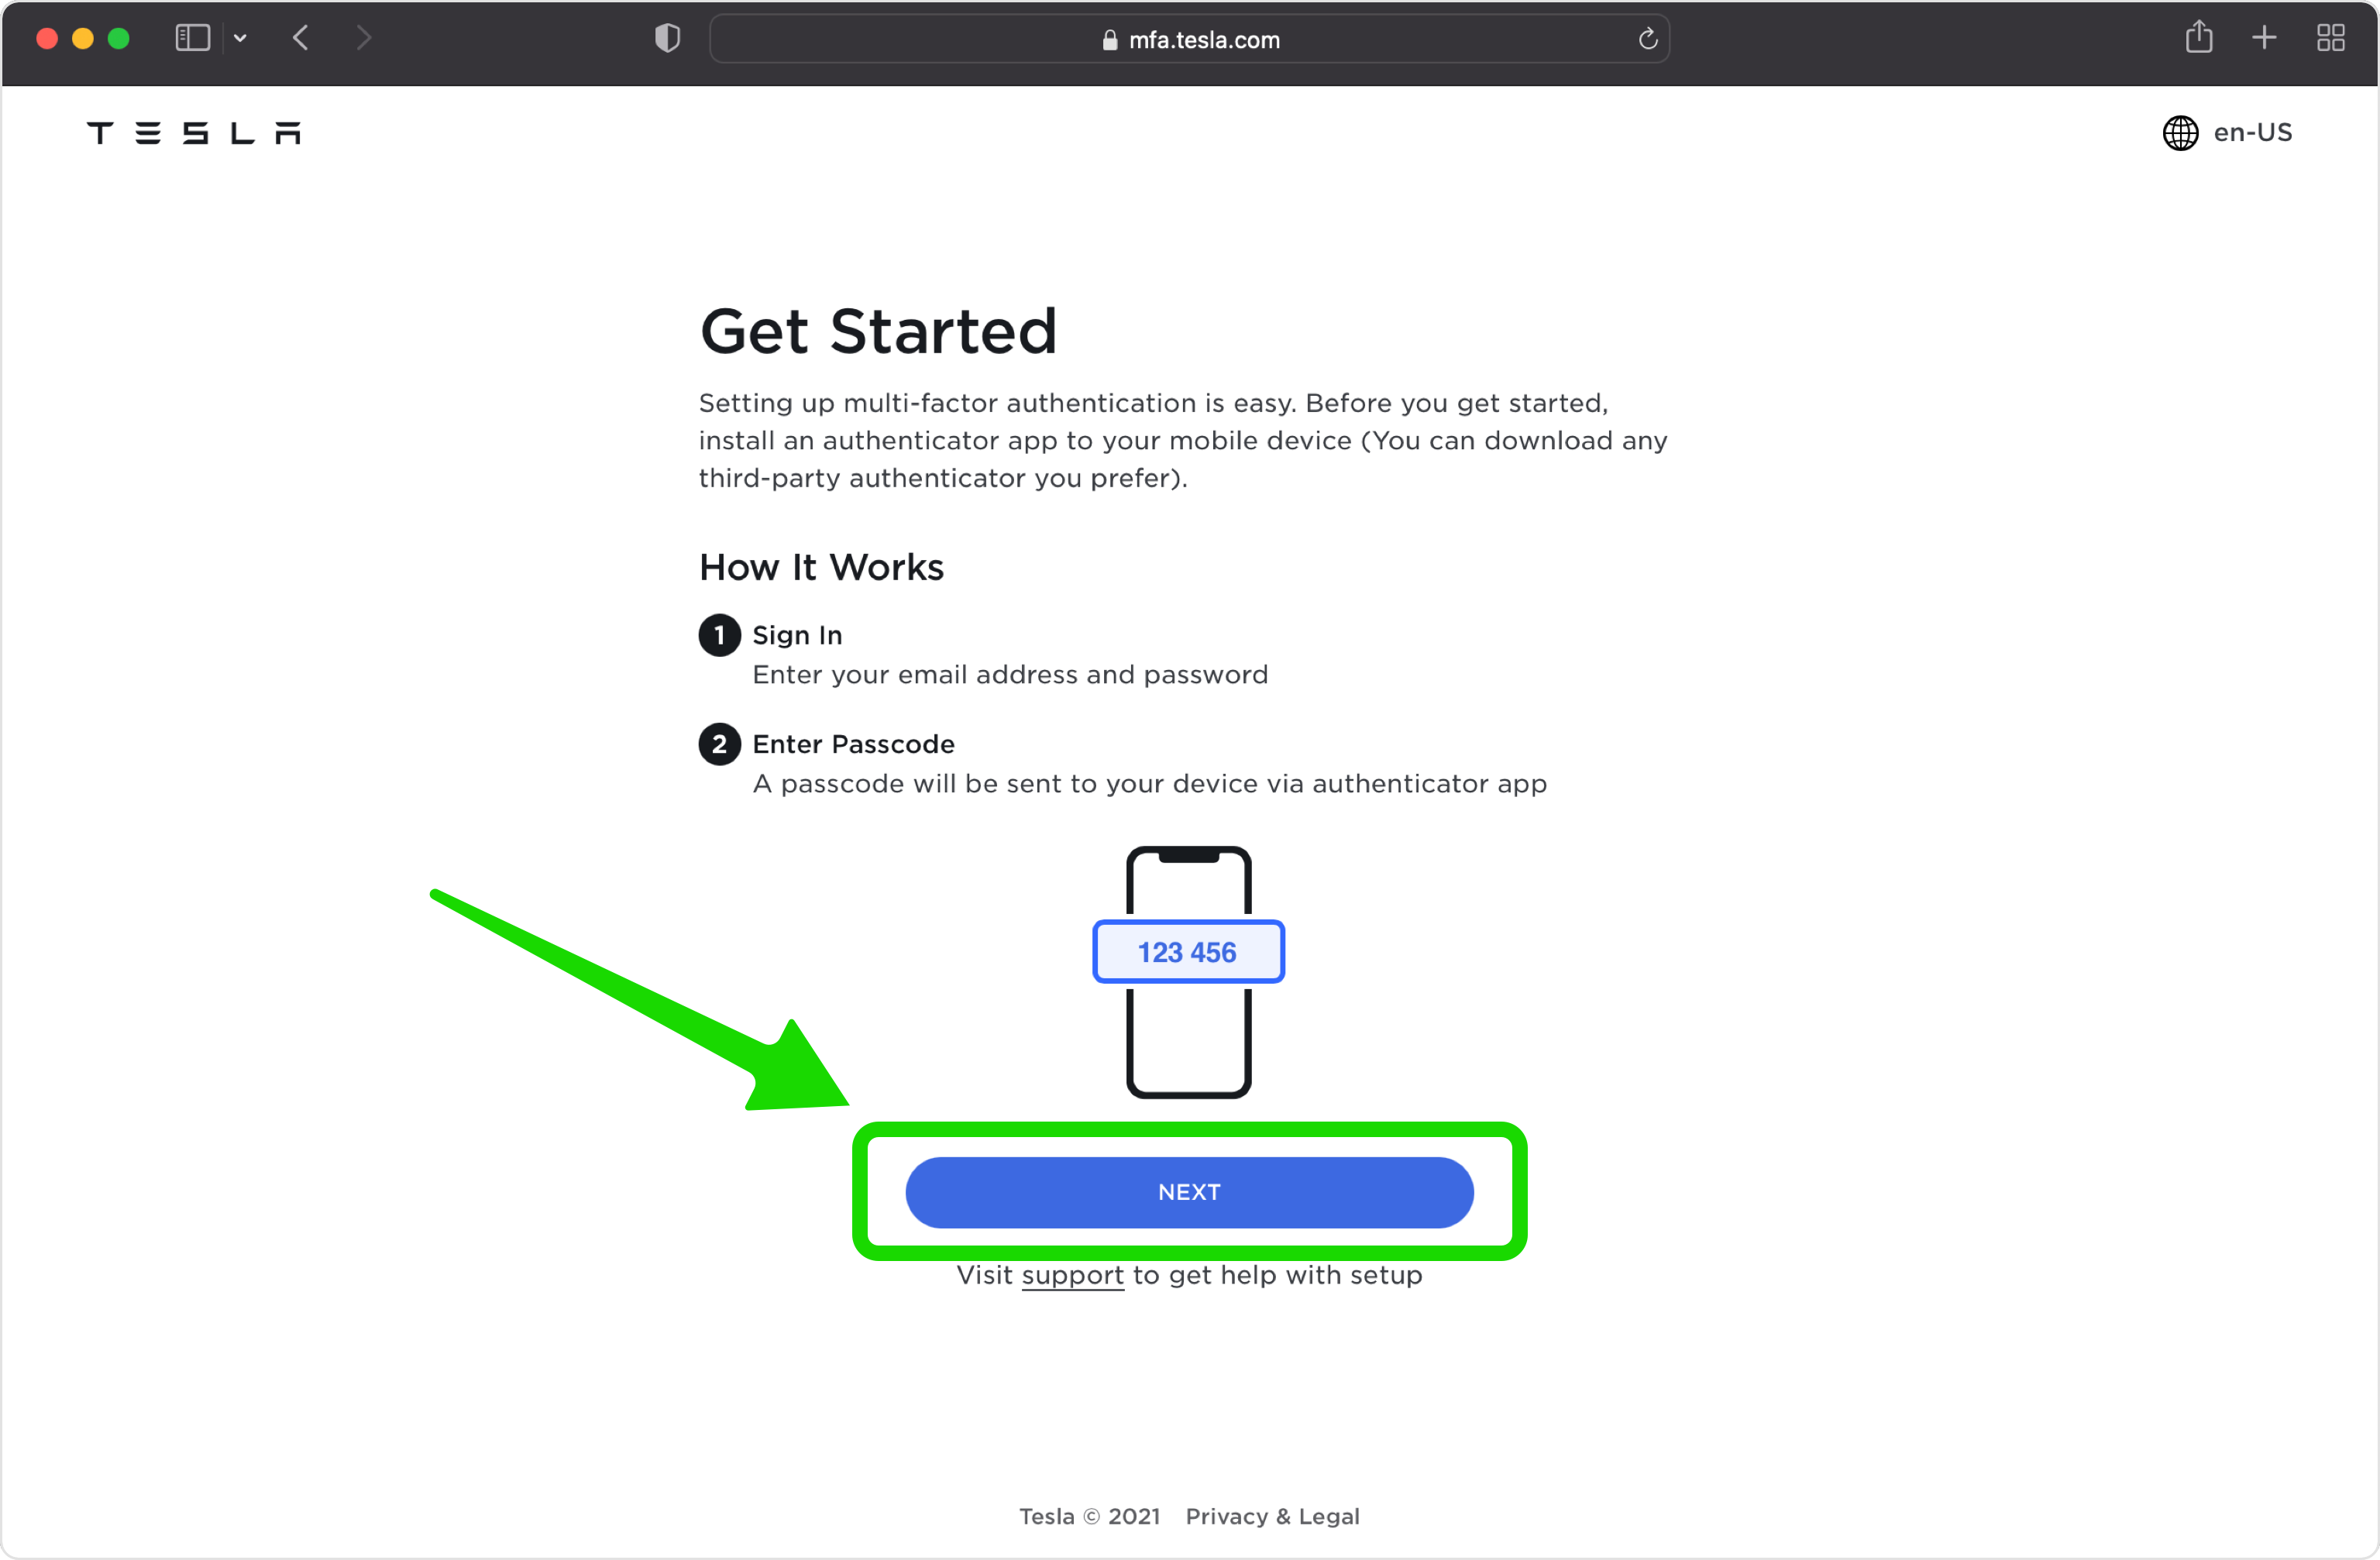
Confirm your Tesla password
For security, Tesla asks you to re-enter your account password before continuing. Type it in to verify it's really you.
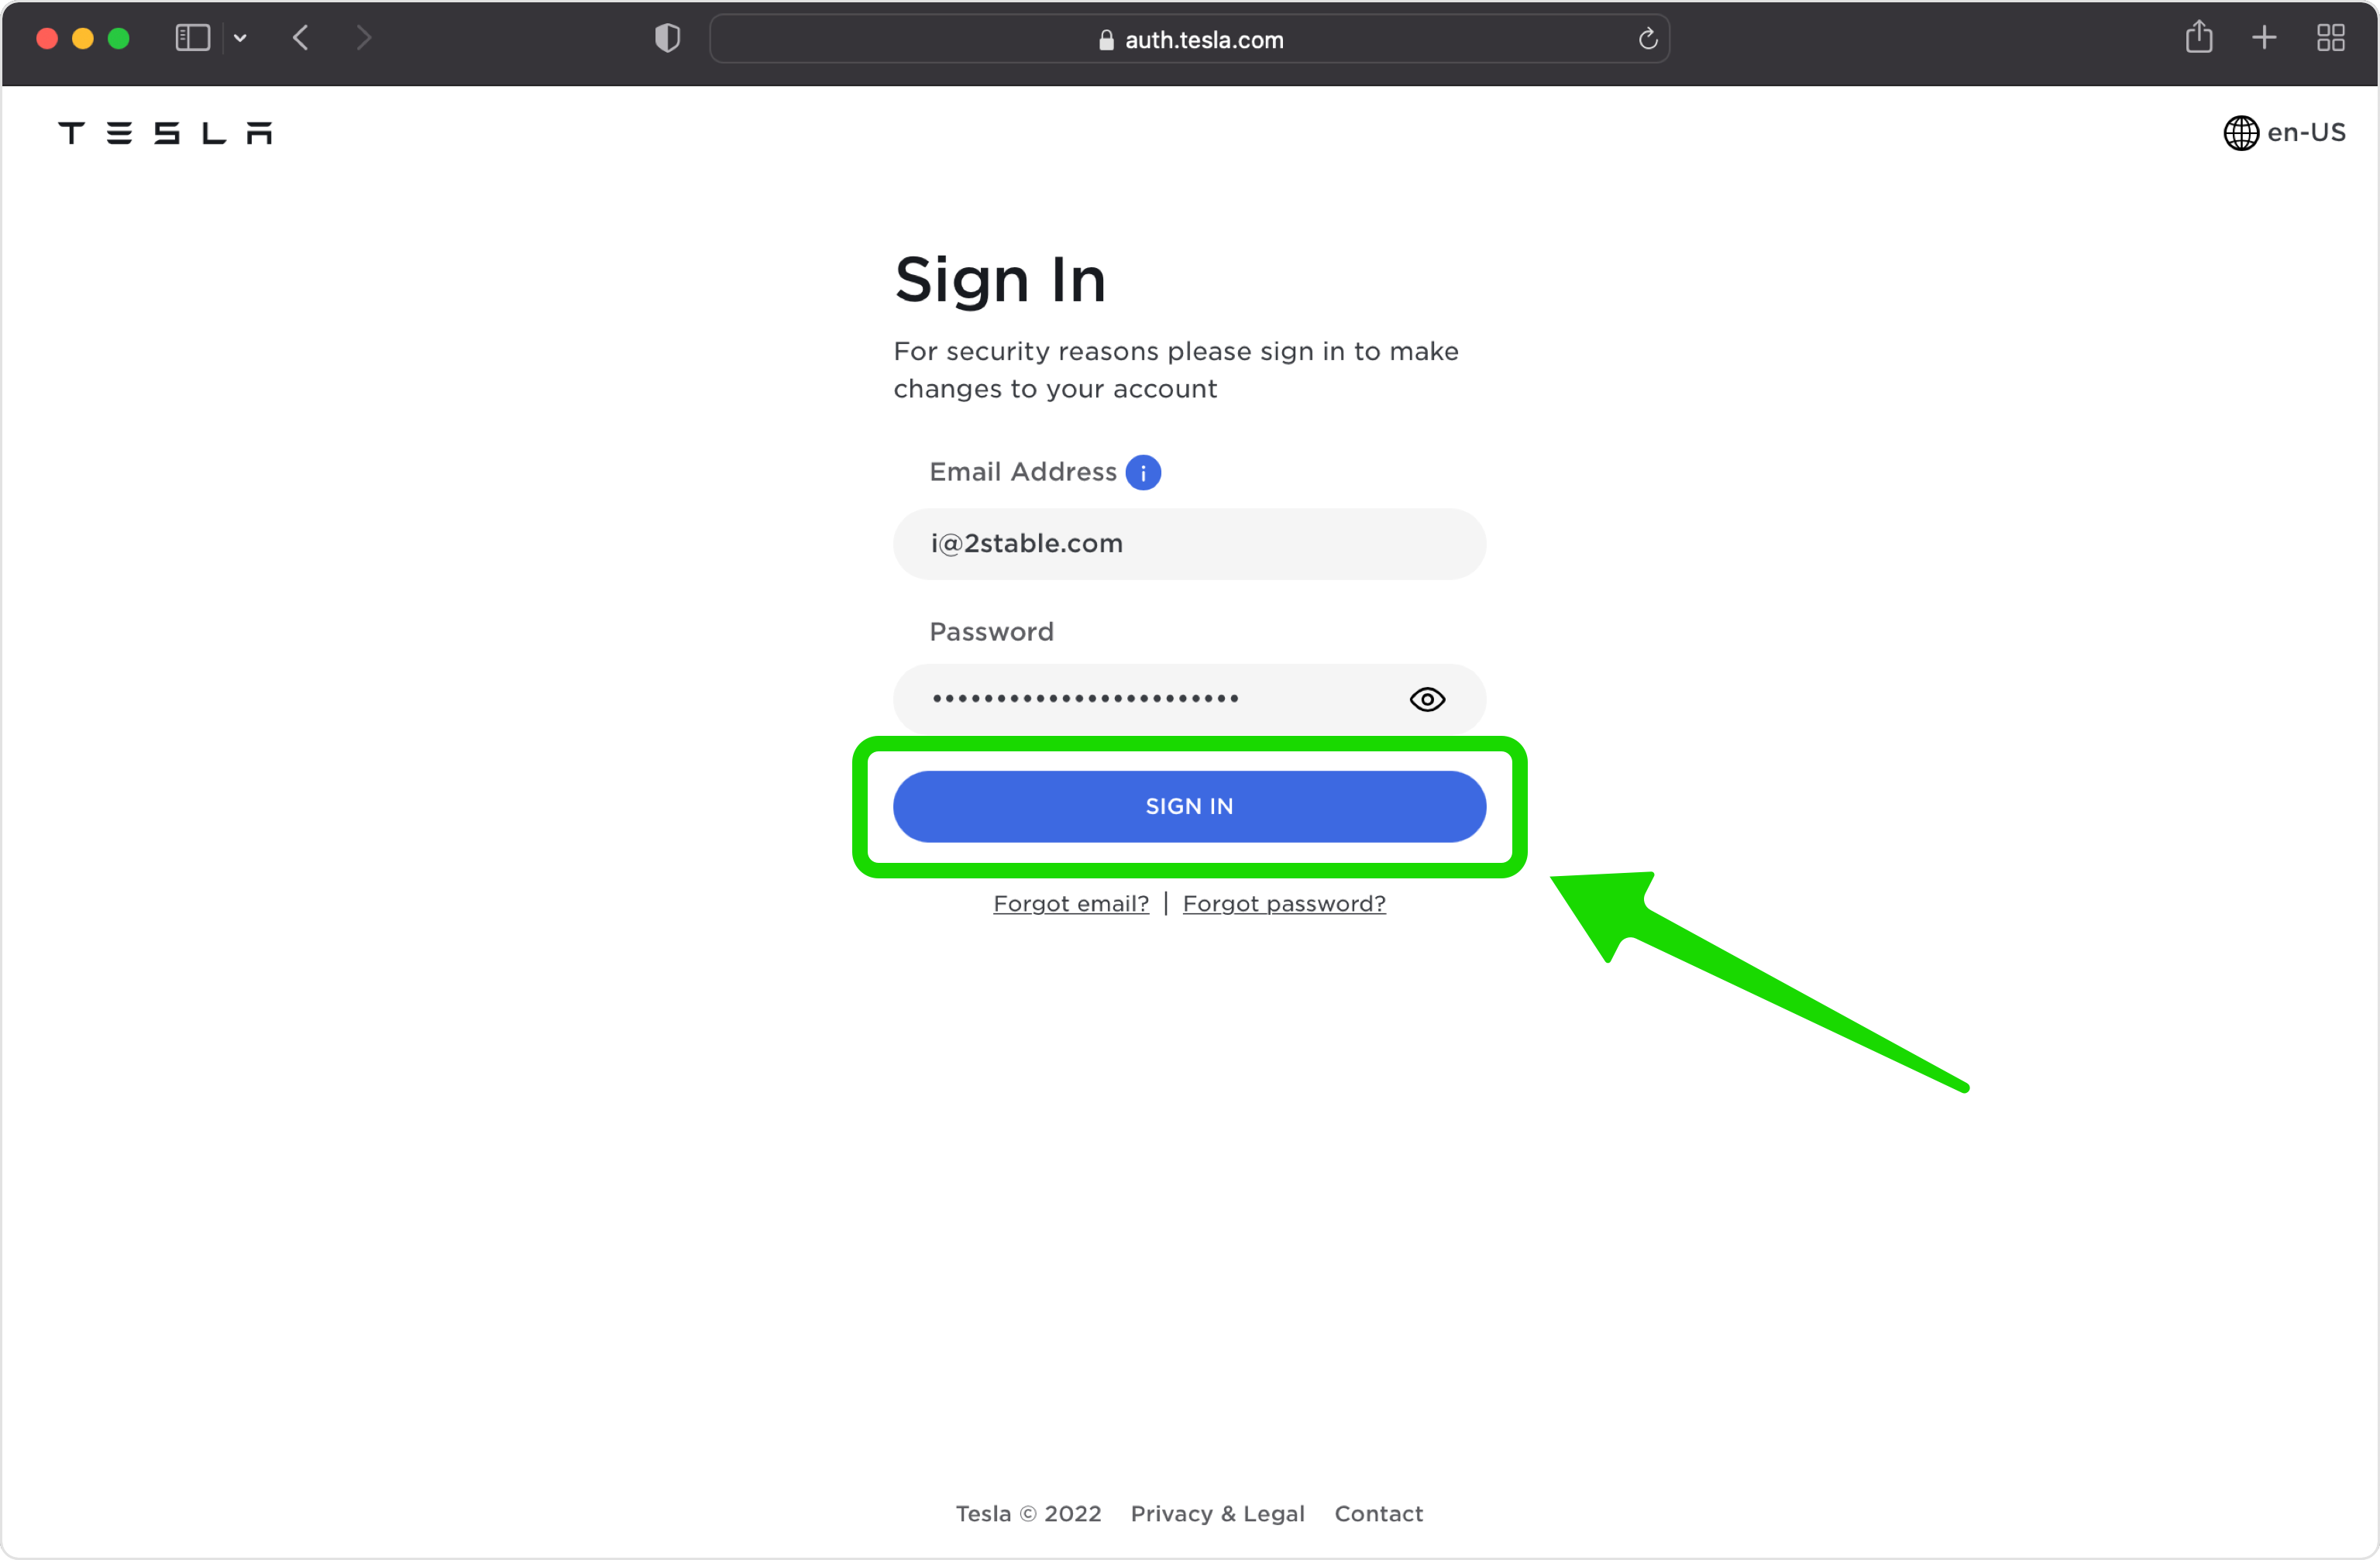
View the QR code
Tesla now displays a QR code that holds your security key. Keep this page open on your computer while you grab your iPhone for the next step. If you'd rather type it in, you can use the security key shown alongside the QR code.
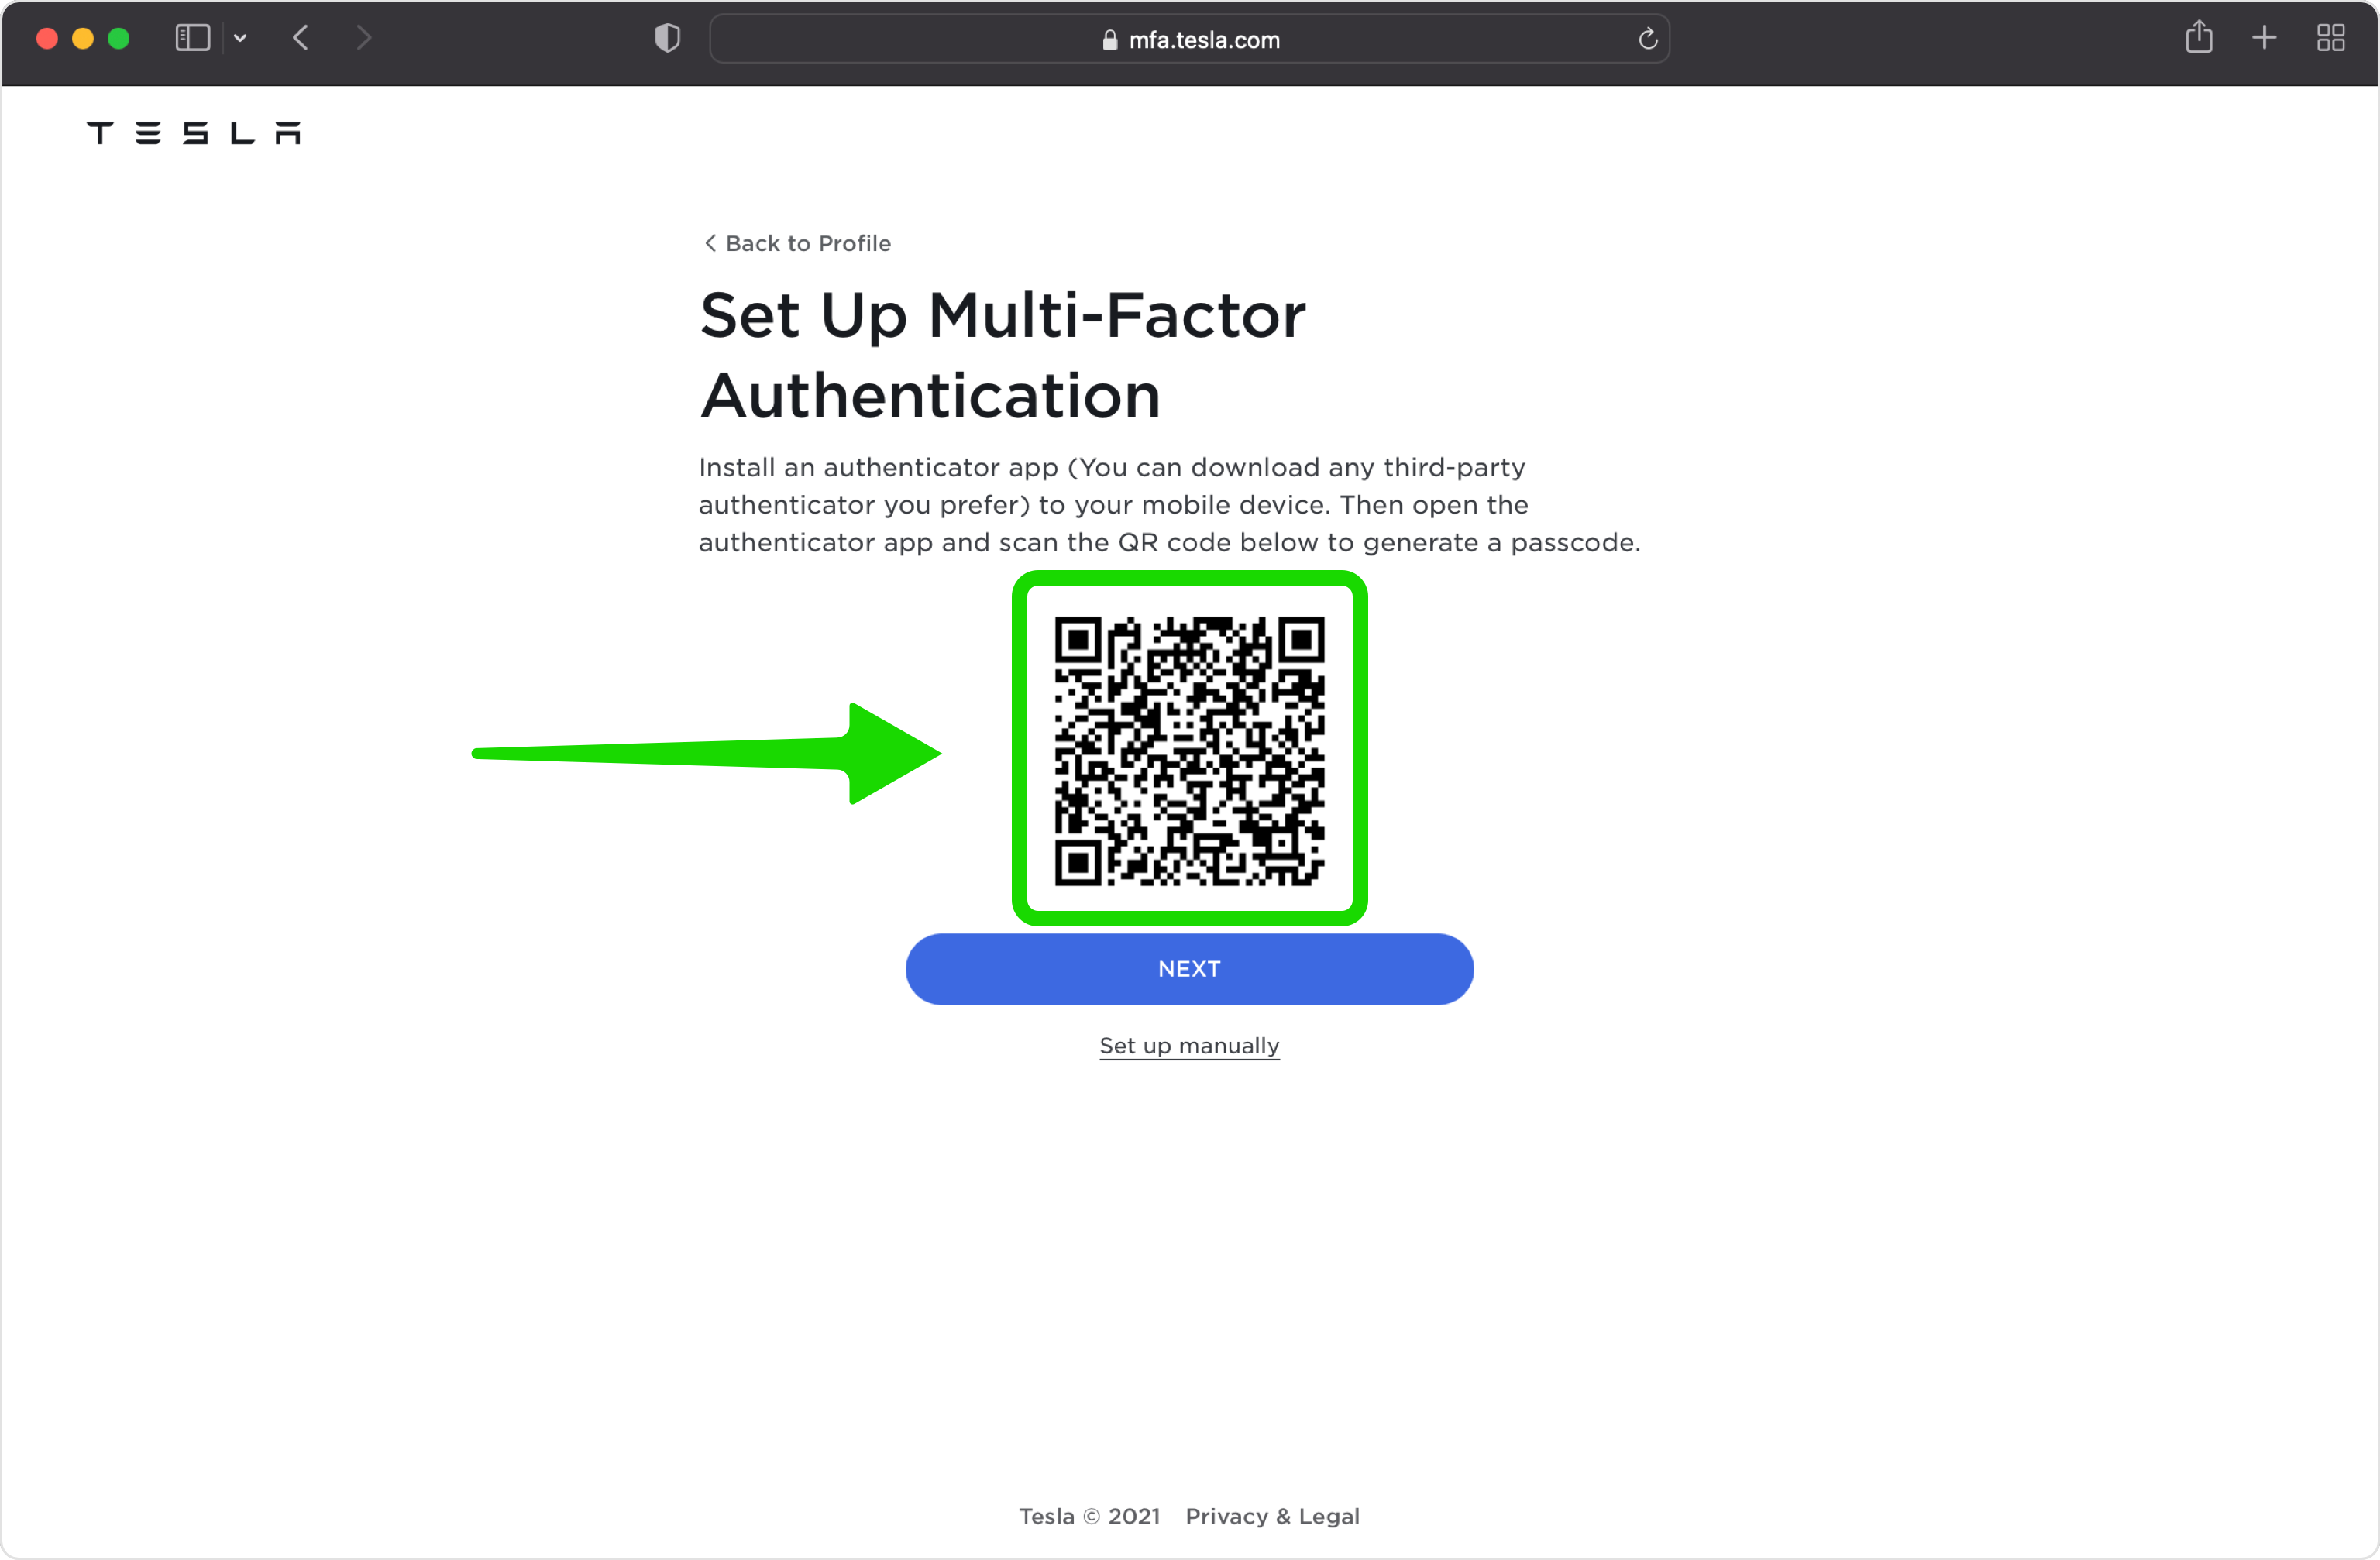
Scan the QR code with your Authenticator App
Open the Authenticator App on your iPhone, tap the + button, and point your phone at the screen to scan Tesla's QR code. If scanning doesn't work, choose manual entry in the app and type in the security key Tesla shows.
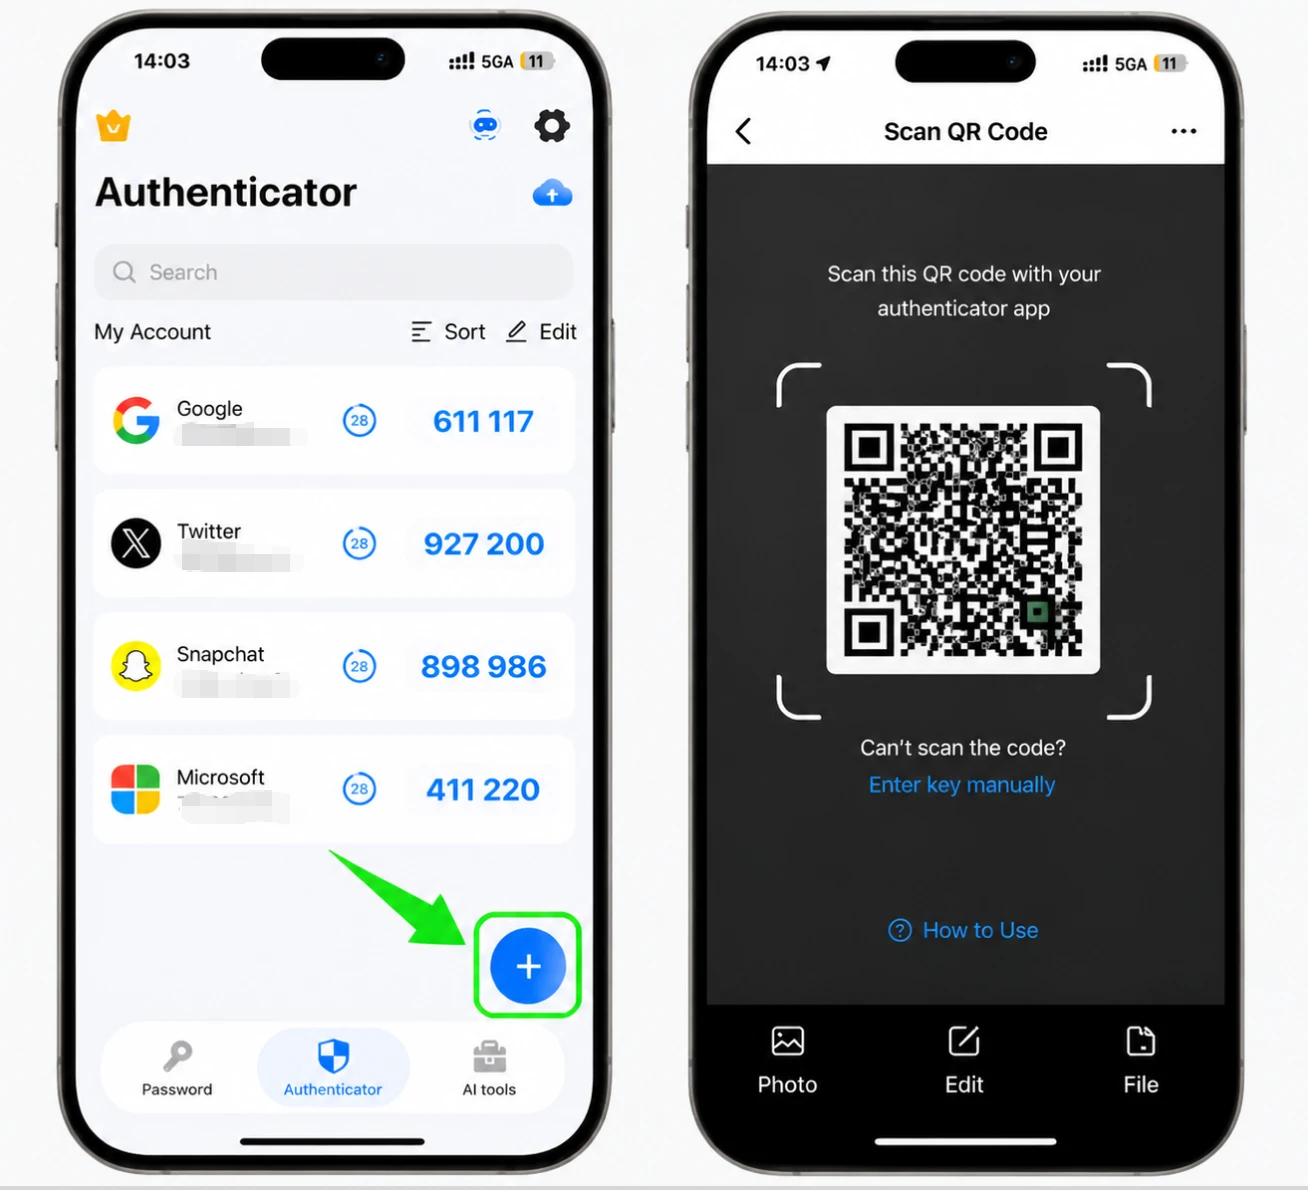
Save the new entry in your Authenticator App
Once the code is scanned, the Authenticator App fills in the Tesla account name and key for you. Tap Save to store the new entry, which will start generating 6-digit passcodes.
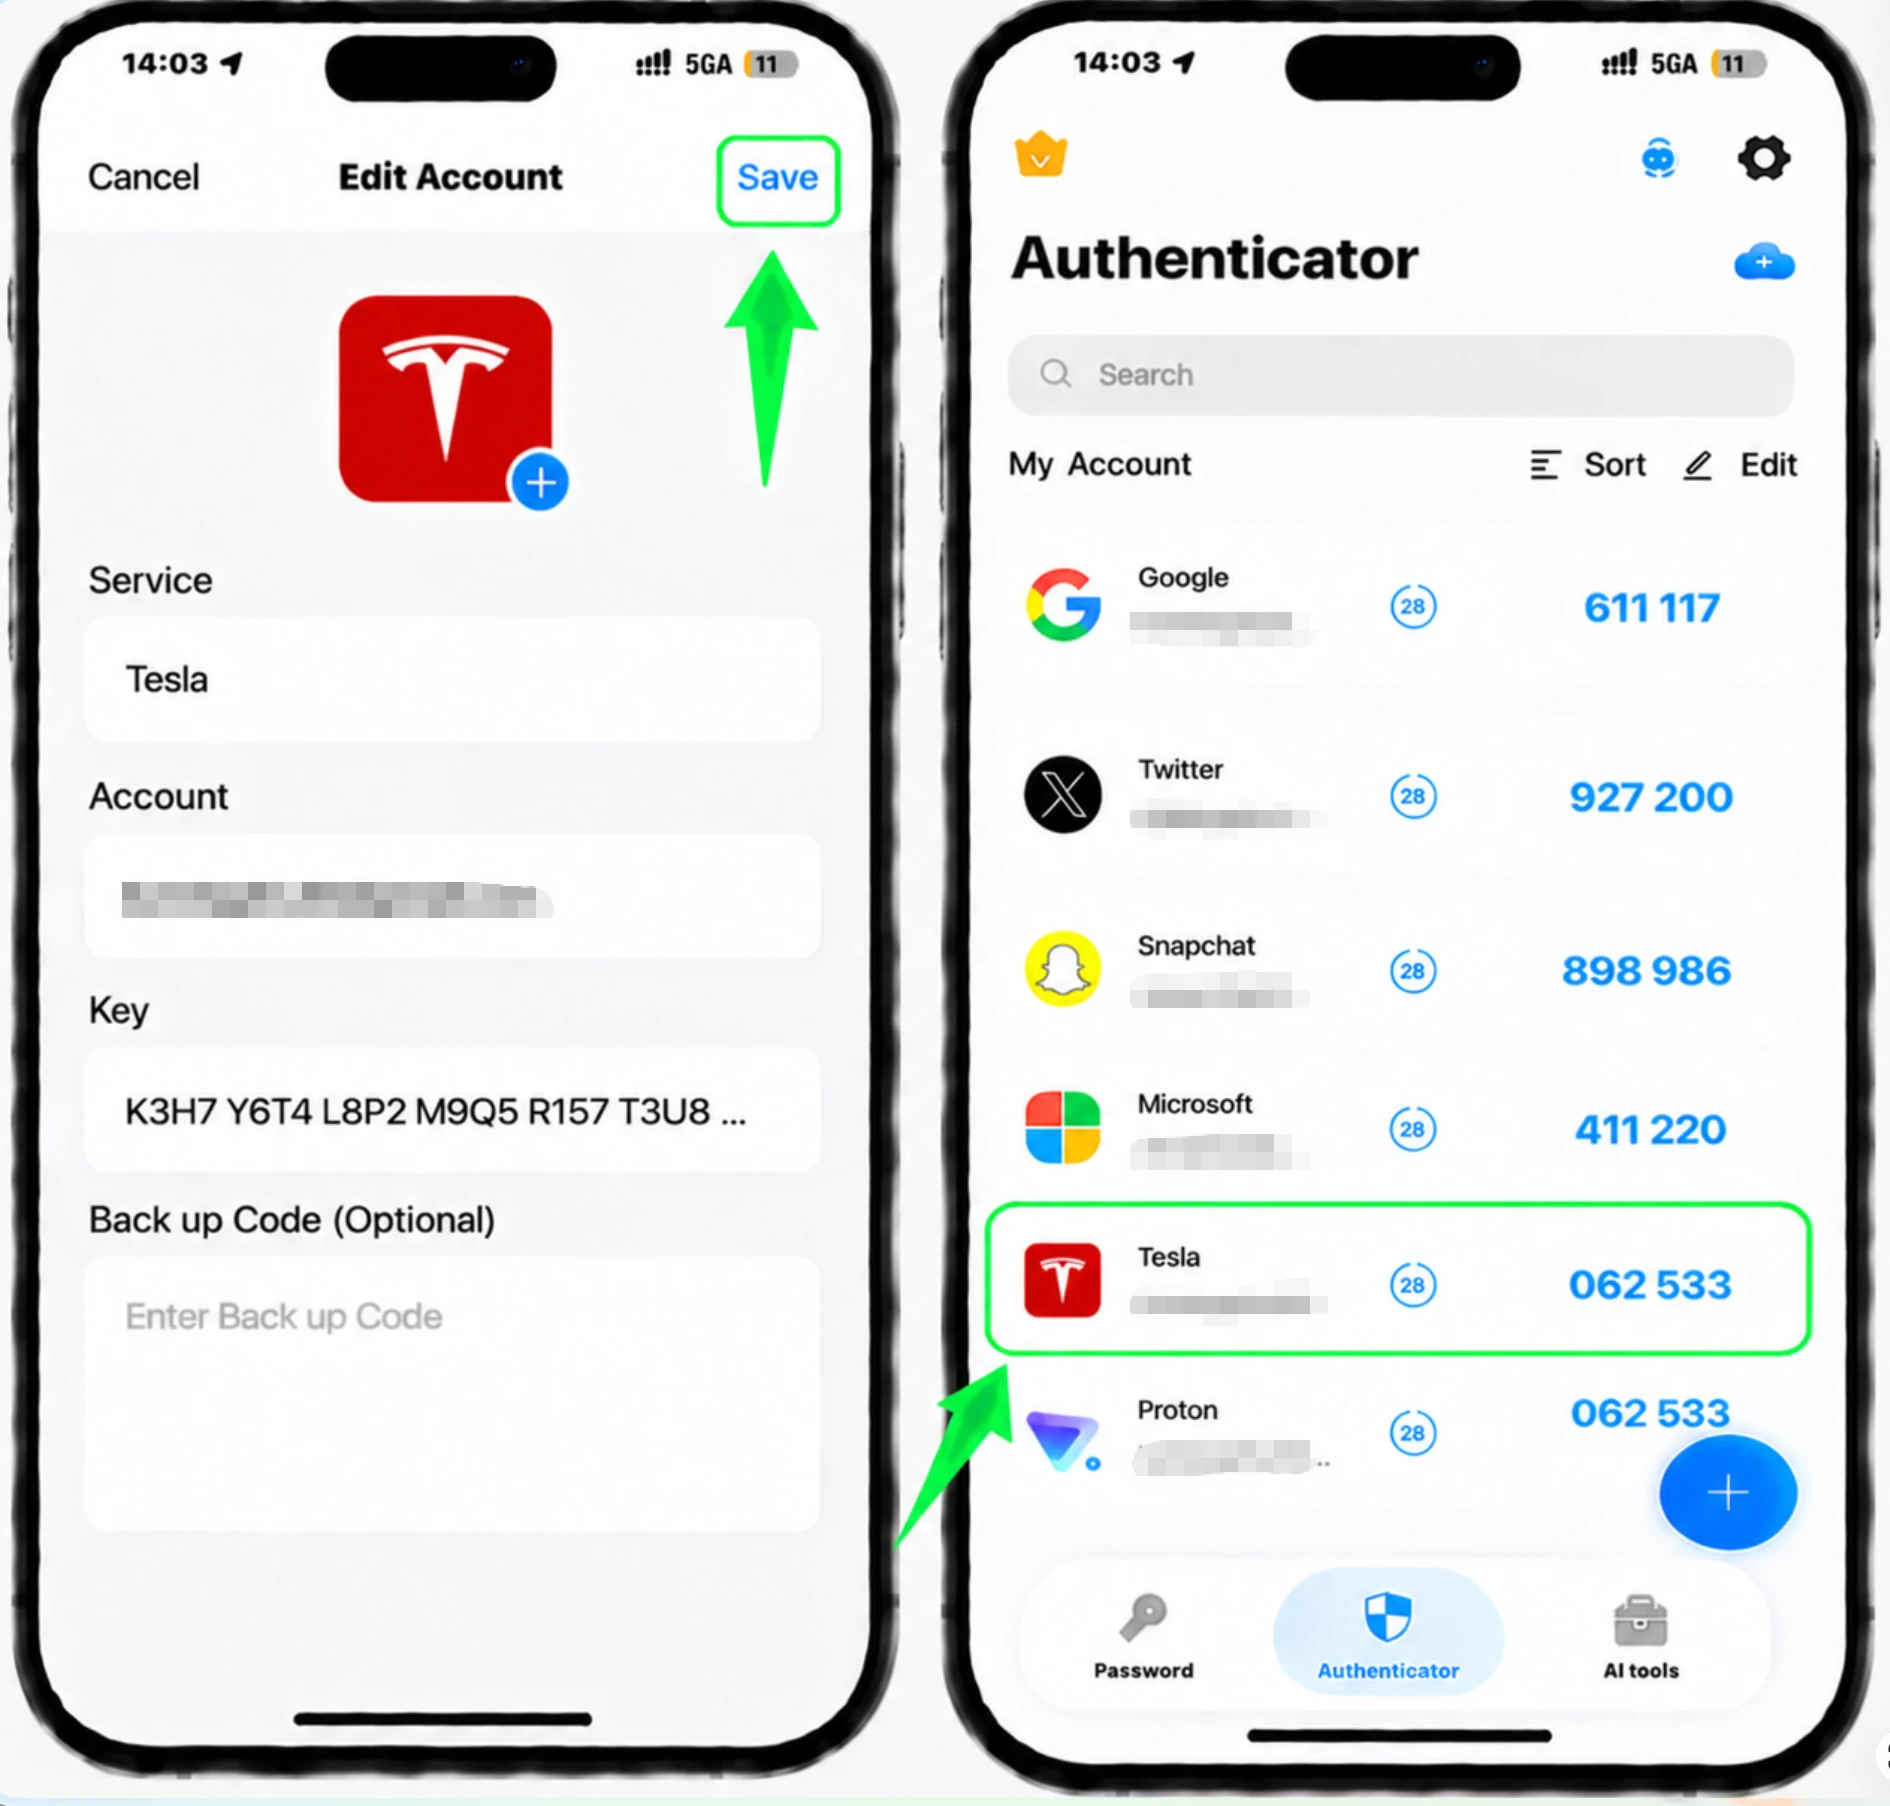
Enter the 6-digit passcode on Tesla
Your Authenticator App now shows a 6-digit passcode for Tesla. Return to the Tesla website and type that passcode in to verify and confirm the connection.
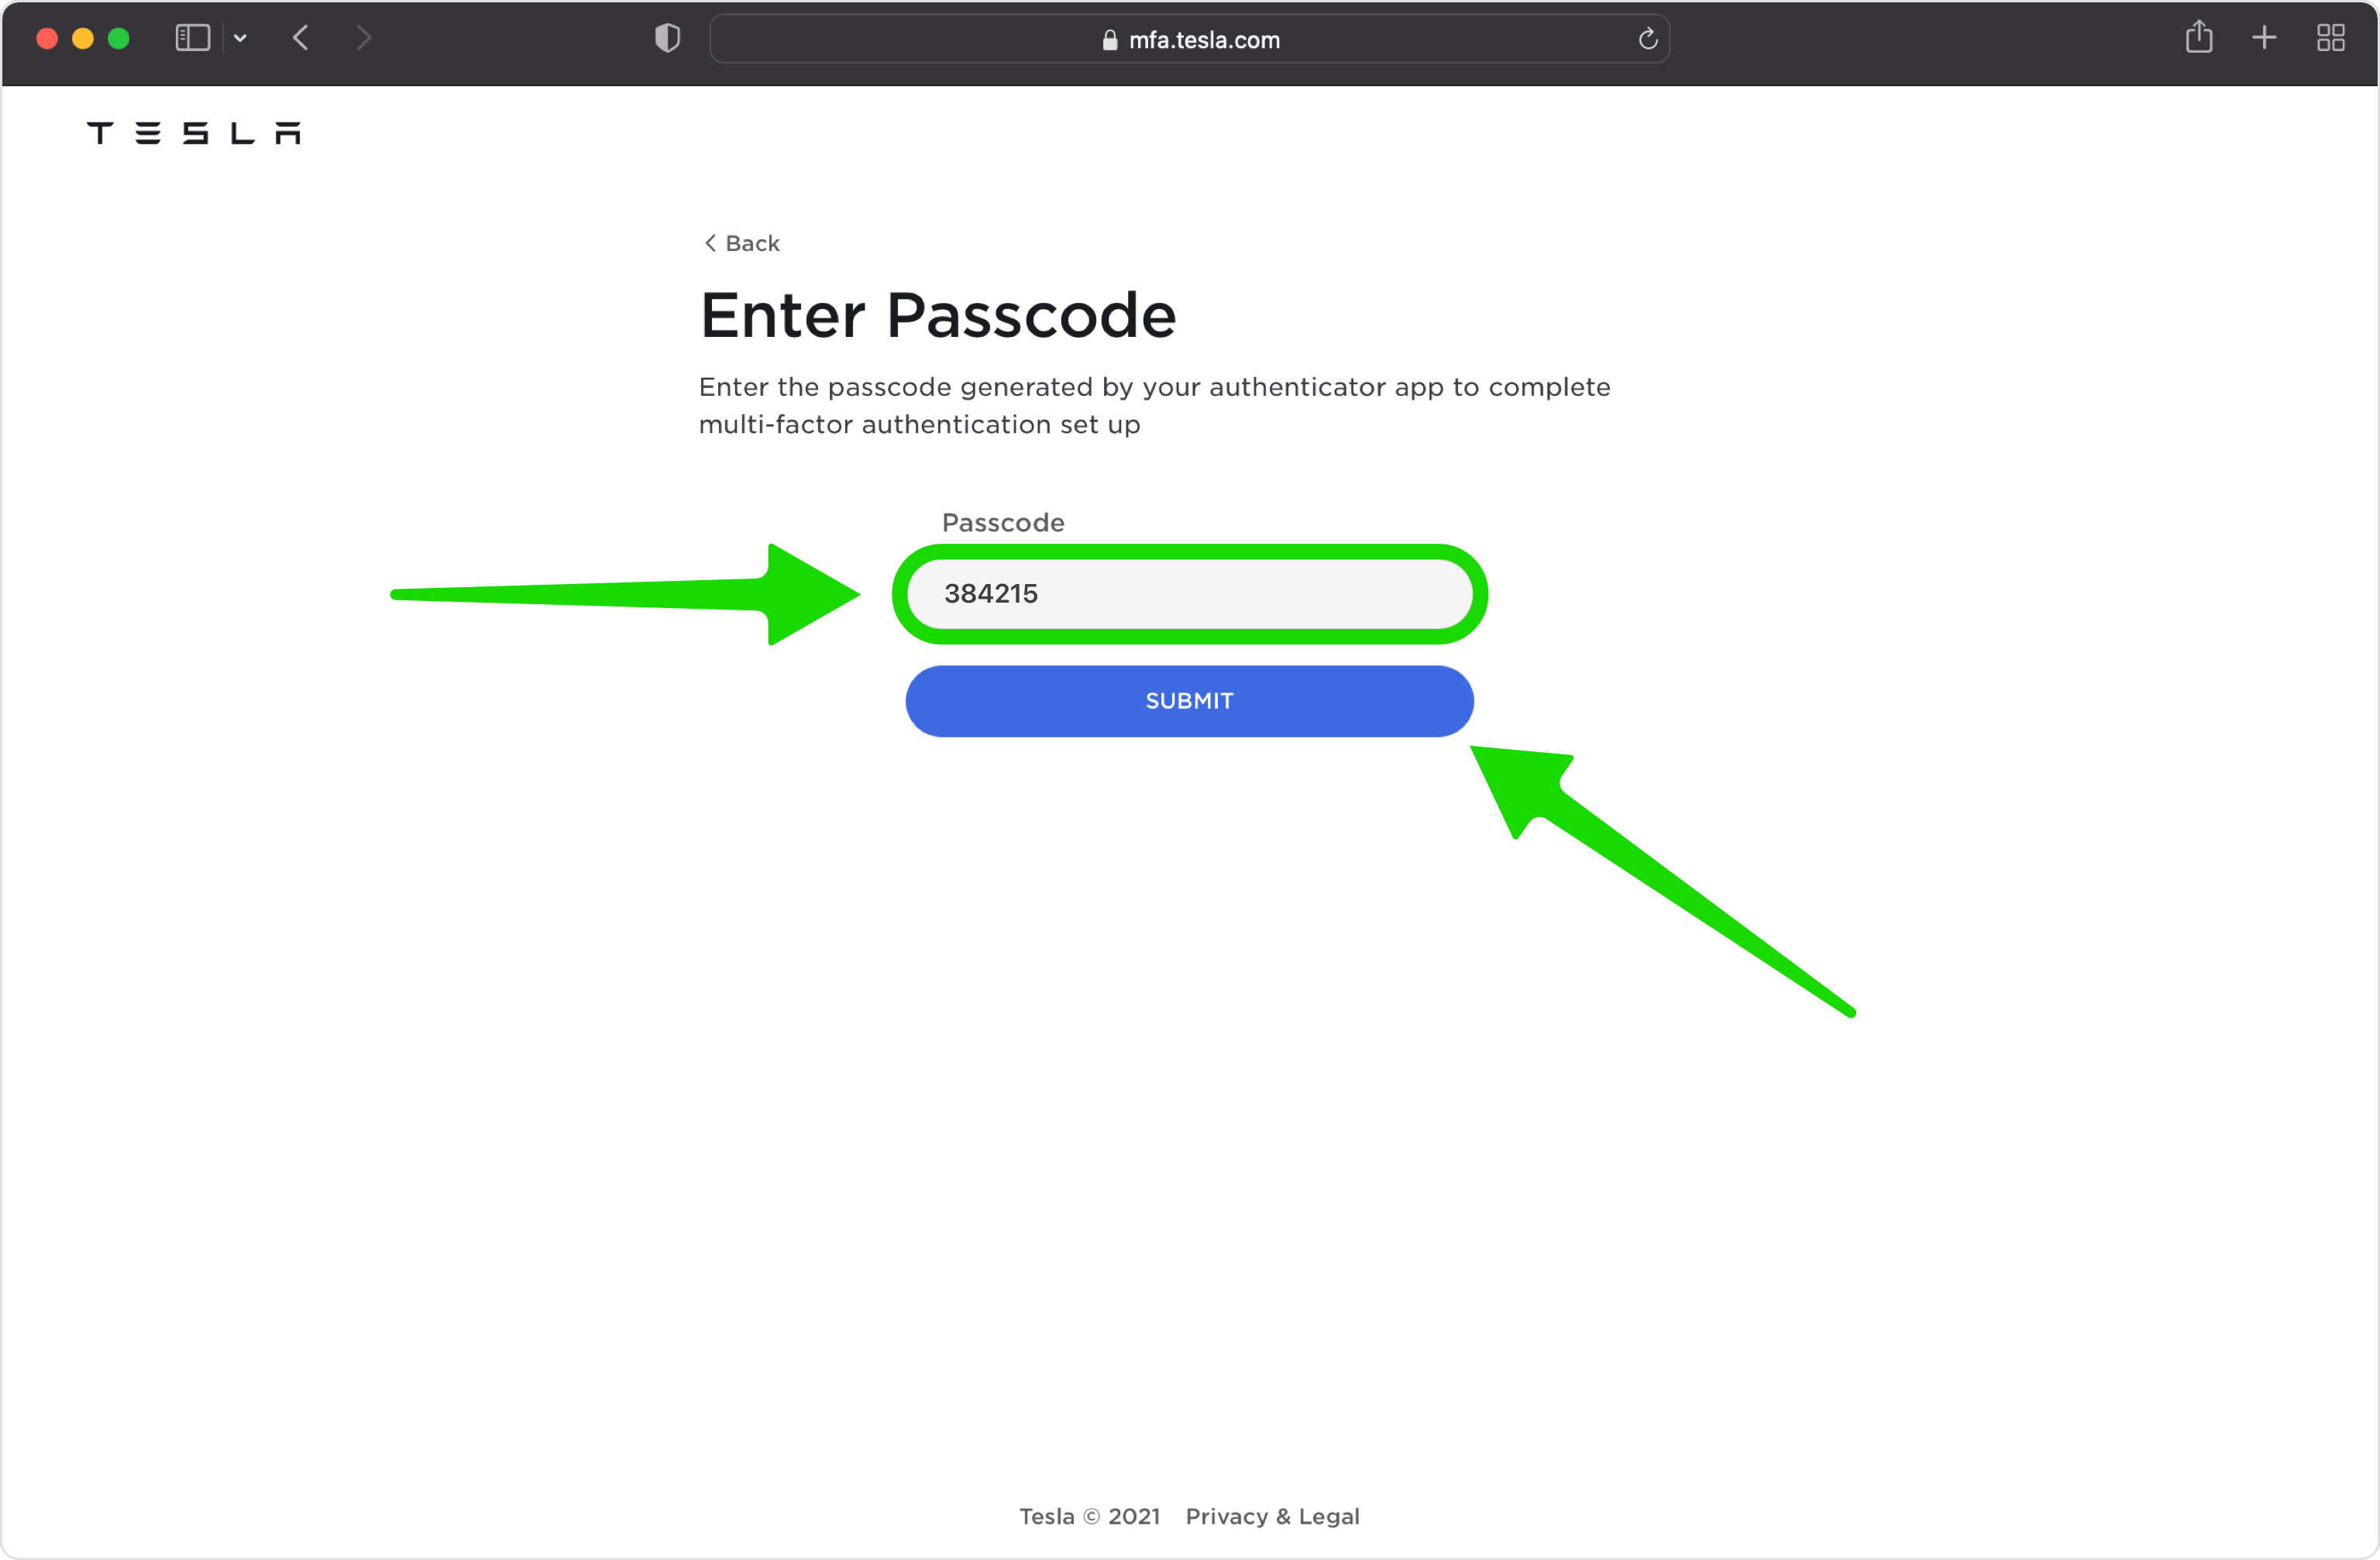
Get and save your backup passcodes
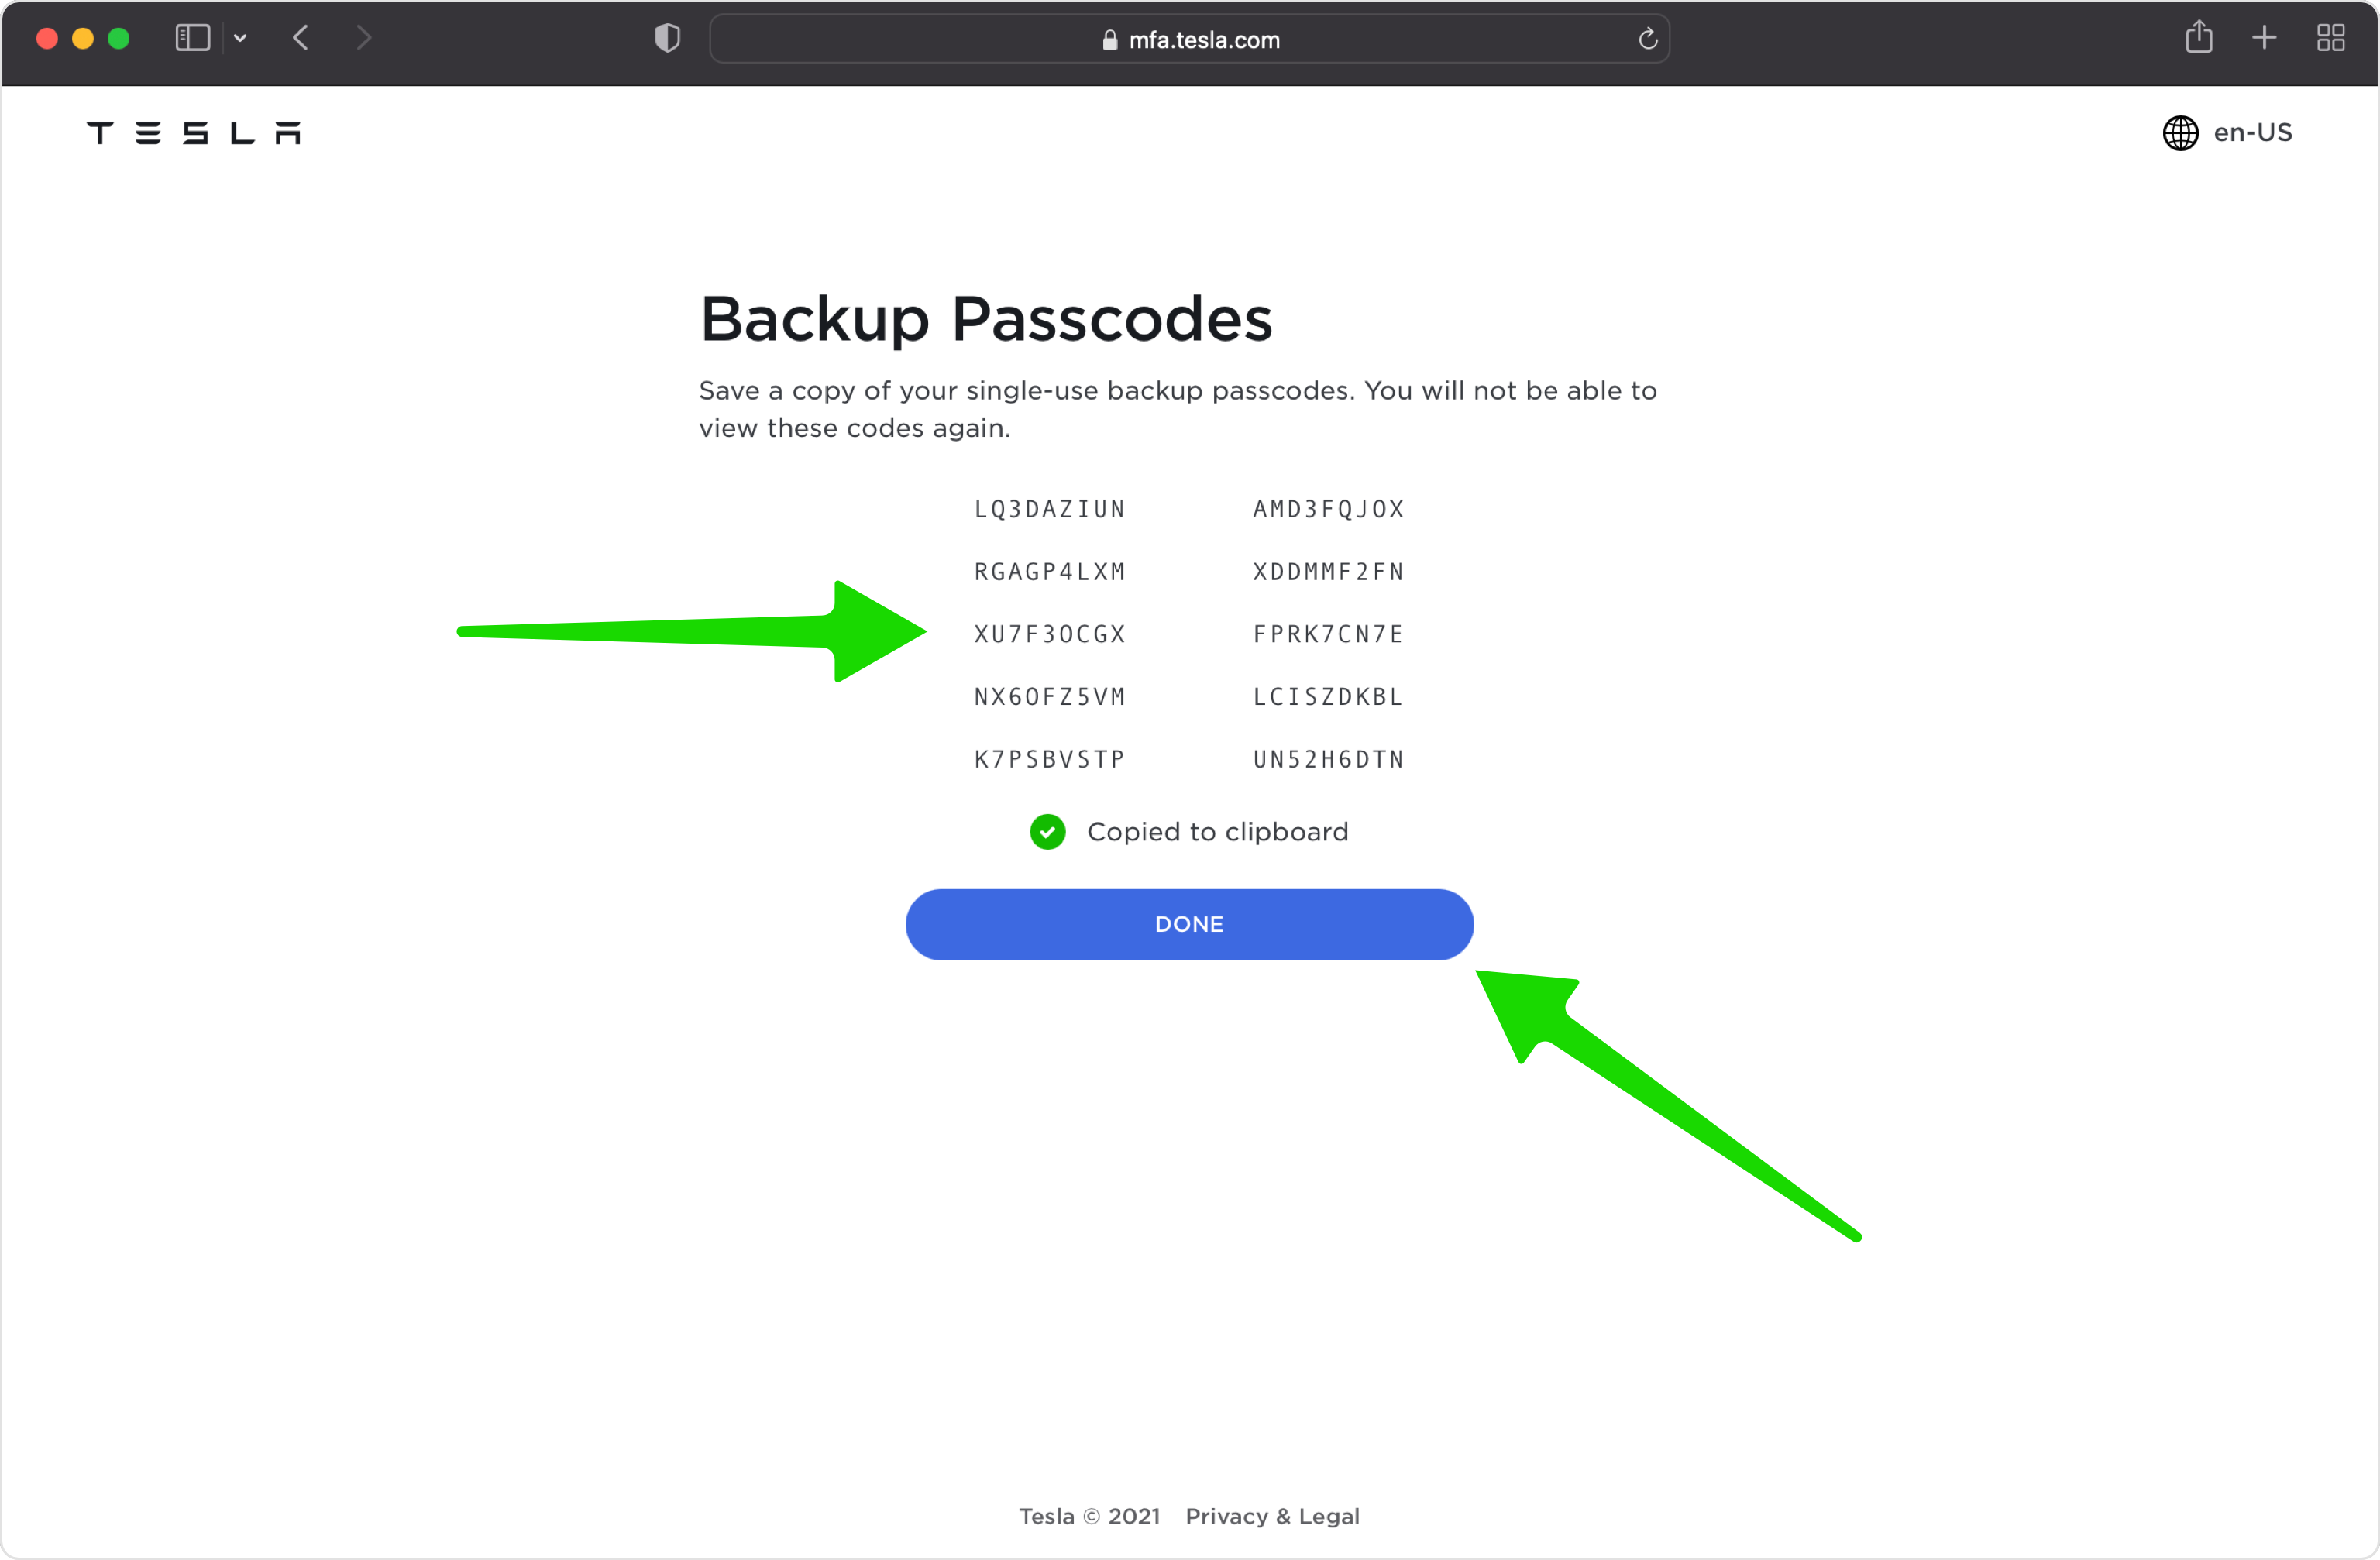
Multi-factor authentication is now on. Tap Get New Passcodes to generate your single-use backup passcodes and save a copy somewhere safe so you can still sign in if you lose access to your authenticator app. Tap Done to finish.


Backup & recovery
Multi-factor authentication is now on. Tap Get New Passcodes to generate your single-use backup passcodes and save a copy somewhere safe so you can still sign in if you lose access to your authenticator app. Tap Done to finish.
That's it — your Tesla account is now protected with two-factor authentication. Keep your recovery information safe and follow the service's official documentation if its interface changes.
See all 2FA methods supported by Tesla →


